Chicken first aid starts with three priorities: protect the bird from further harm, decide whether the problem is an emergency, and contact a poultry-capable veterinarian when professional care is needed. Keep the chicken calm and upright, control active bleeding with gentle direct pressure, separate her from flockmates when pecking or disease spread is a concern, and avoid giving food, water, medication, or supplements by mouth unless a veterinarian or the product label specifically directs you to do so.
This guide provides a practical response plan for backyard keepers. It does not diagnose a disease or replace veterinary treatment. If you are still deciding whether a bird is actually unwell, begin with our guide to how to tell if a chicken is sick. For supplies to assemble before an emergency, see chicken first aid kit essentials.
Chicken First Aid: The First 10 Minutes
- Make the area safe. Secure dogs, close gates, turn off unsafe equipment, and remove the bird from traffic, flock aggression, or the predator scene.
- Look before touching. Observe posture, breathing, alertness, bleeding, balance, and the number of birds affected.
- Identify emergency signs. Severe breathing difficulty, uncontrolled bleeding, seizures, head trauma, open fractures, collapse, or profound weakness need immediate professional guidance.
- Call for help. Contact a veterinarian who treats poultry or birds. If several birds are suddenly ill or dead, contact your State veterinarian or USDA as well.
- Move only when necessary. Keep the chicken upright, support the body, control the wings, and do not squeeze the breast.
- Prepare transport or isolation. Use a ventilated carrier or clean hospital enclosure that limits jumping and protects the bird from pecking.
- Record what happened. Note the time, suspected cause, symptoms, flock exposure, recent feed or housing changes, and anything already applied or given.
The Merck Veterinary Manual’s backyard-poultry examination guidance places acute hemorrhage, head trauma, seizures or other neurologic signs, open fractures, extreme respiratory difficulty, and weakness ahead of a routine hands-on examination. In other words, do not spend valuable time completing a home checklist while a bird is struggling to breathe or losing blood.

Emergency, Urgent, or Monitor Closely?
| What you observe | Response | Do not delay for |
|---|---|---|
| Open-mouth breathing outside heat stress, blue or purple tissue, marked tail bobbing, gasping | Emergency veterinary guidance; minimize handling and transport stress | Bathing, feeding, a full home examination, or trying multiple products |
| Uncontrolled bleeding, deep puncture, predator bite, exposed tissue, open fracture | Gentle direct pressure when safe, protect from contamination, arrange urgent care | Probing the wound, cutting tissue, closing it at home, or forceful cleaning |
| Seizure, head trauma, collapse, inability to stand, severe weakness | Quiet protected carrier and immediate veterinary contact | Oral fluids, treats, or repeated handling |
| Straining, prolapsed tissue, repeated nest visits with distress, penguin-like stance | Prompt veterinary advice; protect exposed tissue from pecking and contamination | Pulling an egg, pressing the abdomen, or inserting tools |
| Limping but alert, eating, and able to bear some weight | Restrict activity, inspect feet and housing, arrange care if severe or persistent | Forcing the bird to walk for a video or repeatedly manipulating the leg |
| One brief sneeze after dust exposure, otherwise normal | Correct dust or ventilation concerns and monitor the flock | Automatically medicating the flock without a diagnosis |
USDA’s Defend the Flock illness checklist highlights sudden deaths, loss of energy or appetite, breathing problems, swelling, purple discoloration, falling or head twisting, diarrhea, and abrupt egg-production changes. A cluster of these signs—or the same signs appearing in several birds—may be a flock-health and reportable-disease issue rather than an isolated first-aid problem.
Observe the Chicken Before You Catch Her
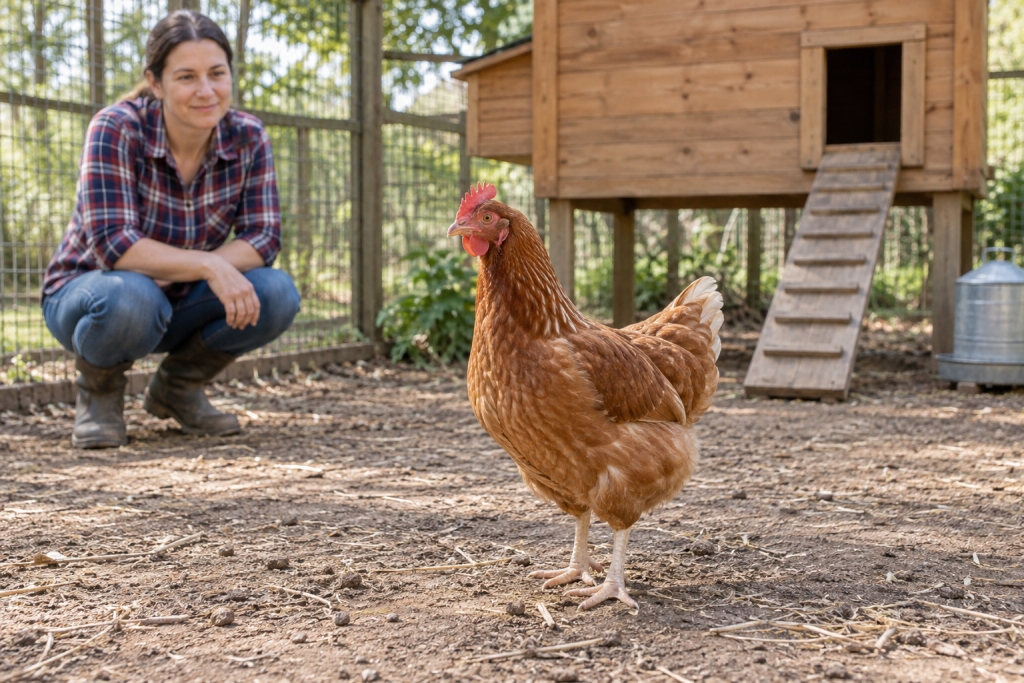
Chickens often mask weakness until a problem is advanced. Watching from several feet away can reveal information that disappears once the bird is frightened or restrained. If it is safe to wait for a quiet minute, record a short video for the veterinarian and compare the affected bird with flockmates.
- Breathing: Is the beak closed? Is the tail moving sharply with every breath? Do you hear wheezing, clicking, or congestion?
- Posture: Is the bird standing evenly, crouched, hunched, twisted, or using a wing for balance?
- Awareness: Does she track movement, respond to flock activity, and keep her eyes open?
- Movement: Can she walk normally? Is one leg avoided? Is she stumbling or circling?
- Flock pattern: Is this one injured bird, or are several birds quiet, sneezing, off feed, or producing abnormal droppings?
- Environment: Look for a predator entry, sharp edge, wet litter, spilled chemical, spoiled feed, electrical hazard, extreme temperature, or blocked water source.
For respiratory signs, use our guide to respiratory illness in chickens. During cold weather, compare the behavior with cold-stress warning signs; during heat, review the signs of heat stress. Temperature stress and respiratory disease can both cause open-mouth breathing, but they require different responses.
Set Up a Safe Hospital Pen
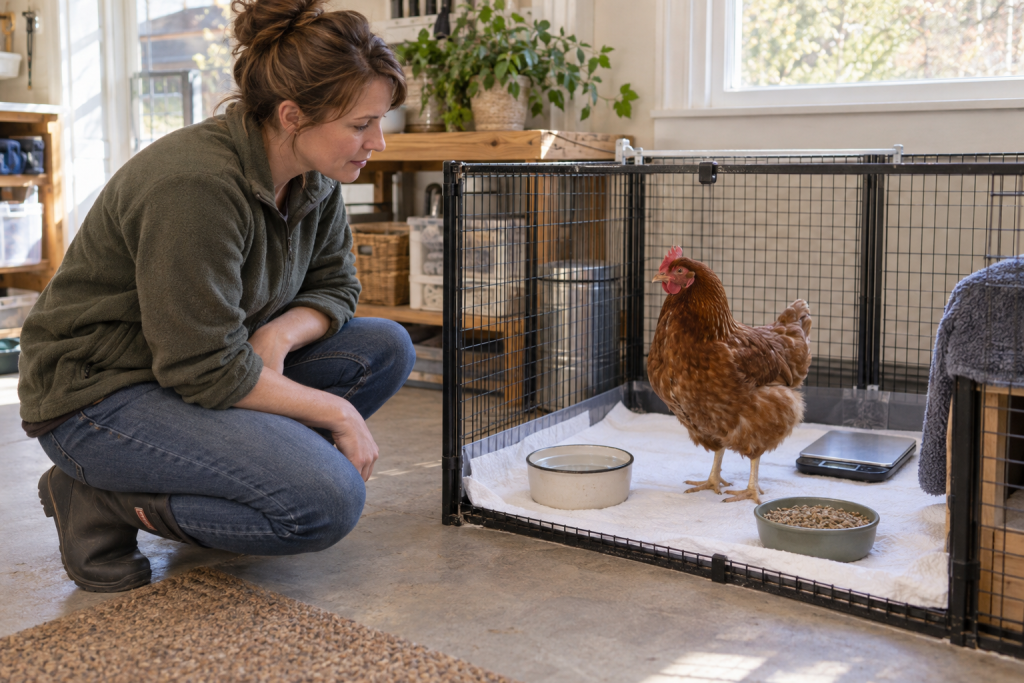
A hospital pen protects an injured chicken from pecking and limits activity while you arrange care. It can also reduce direct contact when illness may be contagious. Isolation is management, not a diagnosis or treatment, and it must not become an excuse to leave a declining bird unattended.
- Use a secure, well-ventilated enclosure large enough for the bird to stand and turn without encouraging jumping.
- Place food and water within easy reach, but do not leave a deep or unstable dish beside a weak bird.
- Begin with a clean, low-slip surface that makes droppings and bleeding easy to observe. Choose bedding only when it suits the injury and cannot contaminate a wound.
- Remove high roosts. A low, stable perch may be appropriate for a steady bird, but a weak, neurologic, or leg-injured chicken is safer without a fall hazard.
- Keep the enclosure quiet, protected from pets and children, and within a temperature range recommended for the bird’s condition.
- Use dedicated bowls, gloves, footwear, and cleaning tools when contagious disease is possible.
- Attend the healthy flock first and the sick pen last, then wash hands and change or clean contaminated footwear.
Our upcoming guide to a safe sick-chicken hospital pen will cover enclosure layout, monitoring, sanitation, and reintegration in detail. For flock-level prevention, follow the routines in Chicken Biosecurity.

Handle and Transport a Chicken Safely
Dim light and a calm approach can reduce struggling. Guide the chicken into a small area rather than chasing her around the run. Once within reach, fold the wings gently against the body, support the breast and feet, and keep her upright. Never carry a sick or injured chicken upside down, and never compress the keel or chest; birds must move the chest wall to breathe.
If breathing is difficult, handling should be as brief as possible. Move the bird into a ventilated carrier with a nonslip liner, keep the carrier level, and avoid loose objects that can roll into her. A ventilated poultry carrier can make planned transport easier, but the correct carrier size and setup depend on the bird’s condition. Call the clinic before leaving so it can confirm that it treats poultry and give condition-specific transport instructions.
See how to catch, restrain, and transport an injured chicken for the complete handling sequence and common mistakes.
A Gentle Head-to-Toe Assessment
Only continue with a hands-on check when the bird is stable enough to tolerate it. Work systematically and stop if breathing worsens, the chicken struggles violently, or the examination causes pain. A home assessment helps you describe the problem to a veterinarian; it does not authorize invasive treatment.
- Head: Look for symmetry, swelling, injury, abnormal head position, and comb or wattle discoloration.
- Eyes and nostrils: Note cloudiness, swelling, crust, bubbles, or discharge without inserting swabs or tools.
- Breathing: Watch the beak, throat, tail, and chest movement. Do not squeeze the breast while listening.
- Body condition: Feel the breast muscles on both sides of the keel and compare with the bird’s normal baseline.
- Crop and abdomen: Note unusual distention, firmness, heat, or pain, but do not massage an abnormal crop or press a distended abdomen without veterinary direction.
- Skin and feathers: Part feathers gently to check for wounds, parasites, broken shafts, swelling, or soiling.
- Vent: Look for pasted droppings, blood, swelling, or exposed tissue. Do not pull on tissue or probe the vent.
- Legs and feet: Compare both sides for heat, swelling, abnormal angle, wounds, raised scales, and footpad lesions.
- Droppings: Save a fresh sample or clear photograph if the veterinarian requests it.
Our detailed head-to-toe chicken health check will provide a repeatable examination and record sheet. You can also compare keel and breast muscle changes with our guide to checking weight and body condition, and use the healthy-versus-abnormal chicken droppings guide for context.

First Aid for Common Chicken Emergencies
Active Bleeding or a Wound
Separate the injured chicken from pecking flockmates. When it is safe to touch the area, use clean gauze and steady gentle pressure. Do not repeatedly lift the gauze to check every few seconds because that can disturb clot formation. Deep punctures, predator bites, wounds near an eye or joint, exposed tissue, persistent bleeding, foul odor, or spreading swelling need veterinary care.
A poultry-labeled wound product such as Vetericyn wound-care spray may be appropriate for label-permitted superficial use after bleeding is controlled. Kwik-Stop styptic powder is a separate bleeding-control product; use it only where the current label allows. Neither product turns a deep wound, bite, fracture, or continuing hemorrhage into a home-care case. The complete process will be covered in Chicken Wound Care.
Broken Pin or Blood Feather
A developing feather contains a blood supply and can bleed when broken. Apply pressure and keep the bird calm. Do not start pulling a feather shaft simply because blood is visible; location, damage, and bleeding severity matter. Use our guide to pin feathers and broken blood feathers and seek professional help when bleeding continues or the bird is weak.
Labored Breathing
Minimize restraint, move the bird away from smoke, dust, aerosols, and ammonia without exposing her to a sharp temperature change, and call a veterinarian. Do not hold the chicken tightly against your chest and do not drip liquids into the beak of a bird that is struggling to breathe. If several birds are affected, treat it as a flock-level disease or environmental emergency.
Straining, Egg Binding, or Prolapse
Repeated straining, distress, a low or penguin-like posture, abdominal enlargement, or exposed tissue requires prompt guidance. Separate the hen to prevent pecking and keep the area clean. Do not break or pull an egg, press the abdomen, or attempt to replace tissue without veterinary direction. Follow the emergency signs in our egg-binding guide.
Limping or Foot Injury
Limit climbing and jumping, compare both feet and legs, and inspect the environment for sharp wire, rough roosts, unstable ramps, or entanglement hazards. An abnormal angle, inability to bear weight, marked swelling, heat, or an open wound warrants prompt care. A dark footpad lesion may suggest bumblefoot, but not every limp is bumblefoot. Compare the findings with our bumblefoot guide and the upcoming article on why a chicken may be limping.
Not Eating or Drinking
Loss of appetite is a symptom, not a diagnosis. Confirm that food and water are actually available and that flockmates are not blocking access, then observe breathing, droppings, posture, crop, laying history, temperature exposure, and recent feed changes. A weak bird that cannot swallow normally can aspirate liquid or food placed in the mouth. Do not force-feed or syringe fluids unless a veterinarian has shown you exactly what to give and how to give it. See Chicken Not Eating or Drinking for a safe decision path.
When Sick-Bird Signs Must Be Reported
First aid is not the right framework for unexplained flock-wide illness. Sudden or increased deaths, severe respiratory signs, head or eyelid swelling, purple discoloration, neurologic signs, green watery diarrhea, or a sharp production drop can occur with serious contagious diseases. Isolate the area, stop moving birds or equipment off the property, and contact a veterinarian and animal-health officials.
USDA advises U.S. flock owners to report sick or dying birds to their State veterinarian or to USDA at 1-866-536-7593. Follow current local guidance because reporting requirements and disease activity change. Do not transport a potentially contagious bird to a clinic, feed store, show, or another property until the receiving professional gives instructions.
Protect Yourself and the Rest of the Flock
Wear disposable gloves when blood, drainage, droppings, or contagious disease may be involved. Keep poultry equipment away from kitchens and food-preparation areas. The CDC’s backyard-poultry guidance recommends washing hands with soap and running water after touching poultry or anything in their environment and keeping dedicated poultry footwear outdoors.
- Use separate bowls, towels, tools, and cleaning supplies for the hospital pen.
- Do not move a dirty carrier directly from the coop into a kitchen, bedroom, or food-storage area.
- Care for healthy birds before the isolated bird whenever practical.
- Change gloves between birds and wash hands after removing them.
- Clean visible organic material before applying an appropriate disinfectant to compatible equipment.
- Keep children and immunocompromised people away from sick birds and contaminated materials.
- Record which birds, people, equipment, and properties had contact with the flock.
Build and Maintain a Chicken First Aid Kit
A first aid kit saves time because clean gauze, gloves, bandaging material, scissors, a flashlight, and important phone numbers are already together. It should support basic stabilization and transport—not encourage untrained procedures or replace a veterinarian. Store every product in its original package, follow the current label, check expiration dates, and replace anything opened, wet, contaminated, or depleted.
The My Favorite Chicken 15-piece poultry first aid kit organizes wound-care, bandaging, supportive-care, handling, and protective supplies in one case. Add your veterinarian’s number, the nearest after-hours clinic that confirms it sees birds, your State veterinarian’s contact information, a flock list, and written directions for reaching your property.

What Not to Do During a Chicken Emergency
- Do not give human pain relievers, leftover antibiotics, livestock medication, essential oils, or another bird’s prescription.
- Do not force food or fluids into a weak, neurologic, or breathing-compromised bird.
- Do not hang a chicken upside down or squeeze the breast.
- Do not probe a wound, push exposed tissue inward, pull an egg, or manipulate a suspected fracture.
- Do not apply several topical products together unless their labels and a veterinarian confirm compatibility.
- Do not assume an electrolyte, vitamin, probiotic, or herbal product treats the underlying cause.
- Do not return a bleeding, weak, or visibly injured bird to flockmates who may peck her.
- Do not move a potentially contagious bird to another property without instructions.
- Do not wait overnight when breathing, bleeding, neurologic function, or the ability to stand is worsening.
The Merck bird-injury guidance similarly emphasizes a quiet low-activity area, gentle restraint without chest pressure, and veterinary direction before giving food or fluids by syringe. When in doubt, the safest home action is often calm containment and a phone call—not another treatment experiment.
Prepare Before You Need Chicken First Aid
- Identify a poultry-capable veterinarian and an after-hours alternative now.
- Keep a clean carrier, hospital enclosure, nonslip liners, and basic supplies accessible.
- Write down each bird’s age, breed, normal weight when known, laying status, and major health history.
- Photograph product labels and expiration dates without discarding the original packaging.
- Practice calmly moving a healthy bird into the carrier so the process is not new during an emergency.
- Inspect the coop and run for sharp edges, loose wire, unstable ramps, predator gaps, wet litter, and damaged electrical equipment.
- Review the first-aid plan with every regular caretaker and post emergency contacts where they can find them.
Prevention will not eliminate every illness or injury, but it reduces delays and avoidable handling. Combine the plan with our daily, weekly, and monthly chicken-care checklist so subtle changes are noticed before they become emergencies.
Frequently Asked Questions
Should I separate every sick chicken?
Separate a bird when she is being pecked, needs restricted activity or close monitoring, or may expose flockmates to contagious disease. However, isolation can add stress, so use a purposeful setup and veterinary guidance rather than automatically moving every quiet hen indoors.
Can I give a weak chicken water with a syringe?
Not without condition-specific instruction. A weak bird or one with abnormal swallowing or breathing can aspirate liquid into the airway. Place an appropriate stable water source within reach and ask a veterinarian how to proceed.
What should I use to stop minor bleeding?
Begin with clean gauze and gentle continuous pressure when the location makes that safe. A poultry-labeled styptic product may be suitable for label-permitted minor bleeding. Persistent bleeding, deep wounds, bites, and injuries near the eye or a joint require professional guidance.
How do I find a veterinarian who treats chickens?
Call avian, exotic-animal, farm-animal, and mixed-practice clinics and ask specifically whether they currently examine backyard poultry. Your State veterinarian, Extension office, veterinary teaching hospital, or local poultry association may also maintain referral information. Confirm availability before an emergency.
When can an injured chicken return to the flock?
Return depends on the cause, healing, mobility, disease risk, and flock response. The bird should be stable, able to reach food and water, and free of exposed blood or tissue that invites pecking. Reintroduce gradually and supervise rather than placing a vulnerable bird back at night and assuming acceptance.
The Bottom Line
Good chicken first aid is calm, limited, and organized. Observe before handling, recognize emergencies, protect breathing, control bleeding with gentle pressure when appropriate, isolate with a purpose, and contact qualified help early. A stocked kit and clean carrier are valuable, but the most important tools are a practiced response plan, accurate observations, and knowing when home care must stop.
Stabilize first, avoid improvised treatments, and let the bird’s condition—not the convenience of the moment—determine how urgently you seek veterinary help.